Hope Braided Hose Assembly
(click on a picture or link for a larger image to open in new window)
** Please read this guide through before starting work on your hose. **
Cutting hoses or cables to an optimum length can be something of a science. Take your time figuring out how long you want/need your hose to be. More often than not, you can just replace the stock hose with the same length of braided hose, but if, for whatever reason, you’re fitting a longer or shorter section, remember the mantra…
Measure Twice (or thrice), Cut Once..
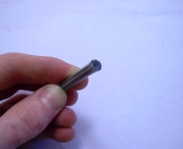
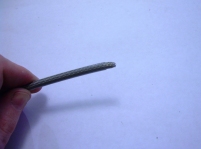
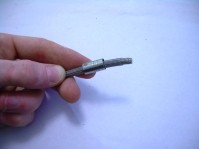
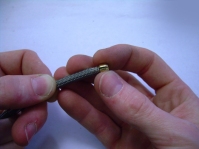
Hope’s own braided hose can be cut with the same cutters you’d use to cut regular brake or gear cable (1). I can’t stress enough the importance of using good quality cutters for this job as anything else is likely to just make a crushed mess of the braids, making assembly unnecessarily difficult, if not impossible. The hose, like normal cables, should be cut with a single, quick movement. You’re aiming to snap the cutting jaws shut to prevent crushing and deformation of the braids or the internal plastic hose. Wrapping a piece of electrical tape around the point where you cut can also help to prevent the hose from being pressed out of shape, although a firm, confident cutting technique with good quality cutters should suffice. Resist the urge to ‘spike’ the hose immediately after cutting!! This will only make fitting the olive more difficult as the hose is likely to flare (2), no matter how careful you are. Instead, roll the hose around under pressure between finger and thumb to get a nice, round hose-end (3). A pair of stub-nose pliers could also be used but take care not to damage the braiding.
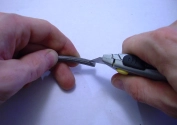
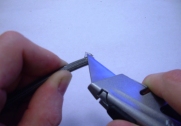
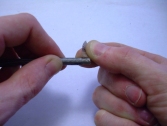
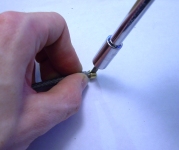
Fitting the Hope olive requires approx. 6mm of unsheathed hose. A sharp (preferably new), heavy, Stanley-type blade is the best tool for the job. Hold the hose under the blade, right at the handle end (4), and press upwards until the blade has cut through the casing and reached the braided section. Now, whilst still pressing firmly, rotate the hose so that it rolls up the blade. It may seem counter intuitive to keep your finger directly under the blade whilst cutting, but as long as you keep it slow and under control there’s no risk of cutting straight through the braided wire. Depending on your technique, you may have to make a couple of ‘passes’ over the casing before you have a complete ‘ring’ cut into it. Once you do, take the point of the blade and make a quick cut from the ring to the end of the hose (5). You should then be able to carefully slide the point of the blade under the casing at the ring and peel the end section away (6). Go slow and be prepared to cut into the casing as you work your way around (7). The casing is heated in the manufacturing process and will have ‘soaked’ into the braided wire, making a single, clean almost impossible. Take care when peeling back the casing that you don’t dig into the braids with the blade as this can create problems when you come to fit the slide the aluminium shroud and the brass olive.
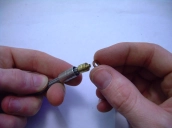
Once the end of the hose is clear of casing, go around the end of the braided wire and carefully bend any rogue wires in over (8), then pop the aluminium shroud over the end of the hose (9), again, taking care not to lift any of the braids. New olives should go straight onto the hose (10)…
…but if it’s been used previously or is just too snug, or there are too many wires in your way that you can’t bend back (bear in mind that they shouldn’t do this if you used a good quality cable cutter), just use the end of a screwdriver to press into the space in the olive and open it out a little (11/12). These little olives will stretch quite a way, so don’t be too worried about opening them up by up to 2mm (this is best done with the olive off the hose!). Push the olive over the hose so that the end of the olive is in line with the end of the hose (13). If you did need to open the olive right out to get it on the hose, use a pair of pliers to press it back towards its original shape. It’s going to be compressed fully by the aluminium shroud, but it’s worthwhile trying to keep things as close to their original condition as possible.
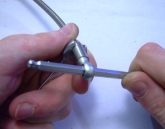
Now that the olive is in place, you can use the spike to clean up the hole at the end of the hose (14). Don’t go crazy; the internal plastic hose is a specific diameter for a reason. Gently but firmly push the spike into the hose, perhaps rotating it slightly as you go. It’s better to do too little and have to open it out some more than it is to go too far and have a loose fitting with the barbed plug. Remember you’re dealing with fluids which will be operating under very high pressure.(15). With the olive and barbed plug in place, place the copper washer onto the end of the plug (16), bring the aluminium shroud back to the end of the hose and thread the 90deg. connector into it. A tip for fitting the connector and shroud on braided hose is to hold the shroud steady with an 8mm spanner and use an Allen key or similar to rotate the 90deg. connector until it’s fully tightened (17). With the hose refitted to the lever, twists can be removed by loosening the shroud and rotating the hose/olive until the hose is straight then tightening the shroud back up. I found that a slight twist in the right places takes the front (RH) brake hose neatly around my head-tube and clear of my fork crown!!
‘Hose rub’ from braided hoses will typically cause more damage to your paint/frame than that from standard hoses, so some kind of tape protection will be a wise investment.
Follow this link for instructions on bleeding your brake.





found something interesting, Goodridge tells you to “pre-thread” the male fitting in the line before putting the collar…any ideas as to why? here is the link, its at p.10
Click to access Goodridge_mtb_brklines_uk.pdf
Curious_G
December 3, 2008 at 10:04 pm
Hello again, George. Just to clarify, but your question doesn’t relate to fitting Hope hydraulic hoses as the Goodridge hoses use their own fittings, which are a different design to those used by Hope. As to why Goodridge instructs pre-threading; what do you think? What would be the advantage of pre-threading the fitting?
SteveUK MTB
December 4, 2008 at 11:33 am
well teacher steve, it would be to allow you to make the threads in the hose coarser since they would be overlapped. Or it could make the fitting looser since it expands the hose…
Curious_G
December 4, 2008 at 6:26 pm
Goodrich [Goodridge] supply Hope their Hoses
Hope-less
August 19, 2009 at 6:50 pm
Nice work fella. Trawled all through the Hope site looking for info on how to fit these hoses. Thanks for your stirling effort.
Ubatoid
January 27, 2010 at 6:30 pm
Just a note of appreciation for your instructions.
Thanks
al cooke
November 6, 2010 at 8:45 pm
Thank you! Your careful and thorough documentation no doubt took much longer than the procedure itself. Your work is sincerely appreciated! I am confident I can do this now, while avoiding an unexpected trip to my LBS.
Tracy
September 24, 2014 at 9:43 pm
than you massively on showing about braided hoses i had no idea the design was so shit they could have made it better without slicing the casing off and now i see i screwed the pooch on mine and may now re try to do this.but eccentially you need a 5 mm unions really nothing special and to ovoid hopes £35 for 2 brake unions sets which would be far cheaper on a motorbike or any other with a 5mm set.but thank you toall who done the pic and description very helpful.will revert back when i get my bits.
up yourse
December 17, 2017 at 2:28 pm