Hope Mini/Mono/Moto Lever Overhaul
(click on pictures and links to open a larger image in a new window)
** Wear Safety Glasses **
This is a guide for a complete overhaul/seal change on a Hope hydraulic disc brake lever. Hope refer to this as the ‘Mini’ lever, it is used on all ‘open’ systems; the silver two-piece Mini/M4’s and the black/gold Mono calipers (Mini/M4/M6) and also the silver/black levers supplied with the ’07 and later Mini and M4 calipers.. The addition of the BPC adjust on the ’07 and later M6 and V2 lever changes the procedure slightly, the details are included in the necessary part of the guide.
You’ll find caliper overhaul guides for the two-piece Mini/M4 here; and the Mono (Mini/M4/V2/M6/Trials) here.
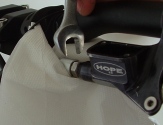
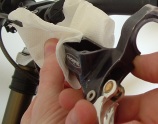
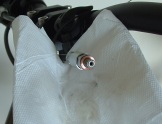
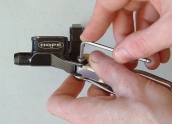
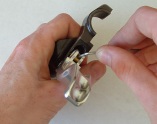
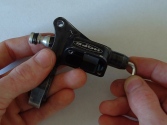
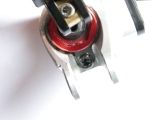
The lever in the pictures was serviced as part of a complete system overhaul, so it was drained of fluid when I came to remove it; hence the lack of top-cap. If you’re only doing the lever, leave the reservoir cap fitted until the lever is removed from the hose. Before you loosen the lever clamp bolts, use an 8mm spanner (10mm for the older Mini) to loosen the hose fitting from the lever (1). Remove the two lever clamp bolts and the clamp, then wrap some tissue around the hose/lever joint and remove the lever fro the fitting (2) (note the copper washer (3)). If appropriate, remove the reservoir cap and drain the fluid.
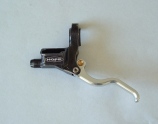
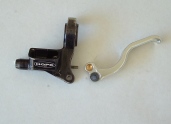
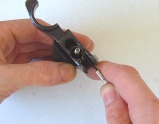
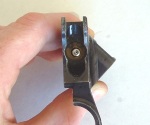
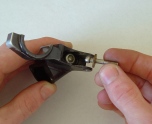
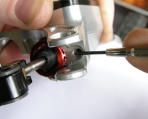
Use an 8mm spanner/socket and a 3mm allen key to remove the lever pivot bolt/nut (4), and a 2mm allen to remove the lever piston pin (5). NB Turn CLOCKWISE to remove the pin from the brass barrel (6). The piston seal is held in place with a retaining clip. This can be carefully prised out with a small jewellers screwdriver (7) or use the circlip pliers. Once the lever blade is removed, the Moto (V2 & M6) lever procedure is different, so stages 7 through to 10 do not apply. Scroll down past the next two blocks of pictures below for the necessary instructions.
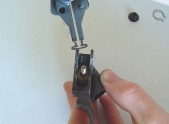
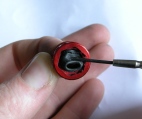
The piston assembly is sprung, and held in place with a brass washer and a circlip (8). You will need a set of circlip pliers to remove/replace this circlip (9). With the circlip removed the pin and washer can be pulled out (10)(remember it’s under a small spring load!). Use a soft/round tipped tool to poke the piston assembly through and out of the lever body. Do not use a screwdriver. A 3mm ball-end allen key is ideal (11)
Moto procedure…
The adjuster pin and piston are held in place by the BPC dial (a) on the Moto lever, so there’s no brass washer and circlip. To prevent the BPC dial from being screwed too far in or, more importantly, too far out, there is a retaining plate bolted into the MC body. The T-shirt shaped pate is in turn held in by a T10 bolt (b), the same interface as the reservoir cap bolts on the MC. With the lever blade out of the way, the T10 bolt can be removed, followed by the retaining plate (c). If you’re finding the plate a little stubborn, make sure that the BPC dial isn’t screwed too far in or out. With the plate removed the BPC dial can be threaded from the MC body. The adjuster is can now simply be removed from the BPC and the adjuster seal lifted out using a point (d). Make sure when you refit or replace the seal that the lip is pressed fully into the corresponding recess otherwise it may inhibit the movement of the lever in operation. To instal the BPC, hold the MC body firmly in one hand and use your thumb to depress the adjuster/piston far enough to allow the BPC thread to mate easily with the MC thread (e). I can’t stress enough the importance of ensuring that the BPC threads are aligned correctly before you use a tool to turn the dial. The worst case scenario of cross-threading the BPC dial is that you’ll need to replace the BPC dial and the MC body. Not cheap.
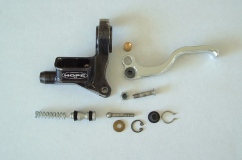
Picture (12) shows the full lever assembly (non-Moto). Take note when you remove the piston which way the two piston seals sit. I they are fitted the wrong way around they will not function.
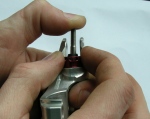
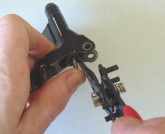
Thoroughly clean all parts to be re-used, with alcohol if necessary – NOT the seals, though, as alcohol will dry them out. Prior to refitting the piston, pour a little DOT fluid into the piston barrel and run a thin layer around both piston seals. Insert the piston/spring into the barrel and carefully push it all the way in (13). Insert the piston pin and brass washer. Whilst compressing the piston, use the circlip pliers to refit the circlip over the brass washer (14). This is a bit fiddly, and may take a few attampts to get it all straight, so take your time. The piston seal and clip can now be replaced and the lever refitted. Refitting the lever to the hose is the opposite of removal, remember to fit the copper washer.
Once the hose is reconnected and tightened up, the lever can be refitted to the handlebars. The system will require a bleed; follow this link for instructions.

Hi,
Thanks very much for this, been searching the net for a while now. Cheers for taking the time, this brake is the only thing stopping me riding my DH bike now!
Cheers
Willow
Willow
March 29, 2010 at 8:10 pm
Hi there,
you just saved my day with this instruction.. Thanks a lot!
Marco
April 28, 2010 at 4:07 pm
JUst found these instructions and I am having trouble getting the piston and piston pin back in. The piston does not want to go all the way in so when I compress with the pin and washer/circlip it becomes very difficult to get it to work. I cant see any groove for the irclip to slot into? Does the piston need to be compressed fully?
Any tips would be really helpful
Thanks
Nigel
April 18, 2011 at 7:55 pm
It should just be a matter of pressing it in. Unless you go in perfectly straight, the seal(s) can prevent the piston going in. If you think about how much pressure they can withstand under braking, it’s easy to understand how they might potentially offer resistance when you try to slide them down the piston bore. Pouring some brake fluid into the bore and over the seals might help.
SteveUK MTB
April 20, 2011 at 11:38 am
Hi – can you advise me on what could be causing excessive (pre ’07 mini) lever travel on my rear brake? Both the mono caliper and lever have been stripped, cleaned and re-built with new seals/diaphragms. The phenolic pistons, Goodridge braided hose, Hope pads and DOT 4 fluid are all brand new. I’ve bled the system many times with the caliper above the lever, tapping the lines and caliper body etc. The caliper is shimmed and centered.
The pistons are sensitive to lever action and once they meet the disc, the brake feels firm…but the lever travels almost all the way to the bar as though the pistons are retracting too much.
By comparison, the front brake is very firm with only a cm’s throw at the lever and the pads seem to drag a little after release, which I would expect. I can only think that either I still have air somewhere, or the rear disk is too worn…although i would expect the brake to adjust to slight changes in thickness.
Any advice/thoughts would be greatly appreciated – maybe a pressure bleed?
Great site!
Cheers,
Chris
Chris
July 8, 2011 at 3:25 pm
Hello Chris,
If the lever feels firm when the pads hit the rotor, then, at least for now, I’m going to assume that the brake is bled of air. So there are a couple of things try: one is to make sure that the pistons are both extending fully. If one is sticking in the caliper, the other will have to extend twice as far and push the rotor across. You’d probably get some rubbing on the rotor if this was the case, but not necessarily. So, you need to confirm that the pistons are equalised and properly extended. Quicker than me describing this, check out the video on the Hope website ([url=http://blip.tv/play/gpkd4OoGAA]link[/url]). Given that the seals and pistons are new, it’s quite possible that you’re just having some issues with friction. DOT fluid or a silicon lube can be used as described at the beginning of my Mono caliper overhaul page. If you’re having issues with drag on the front brake, it could be worth going through these on that brake too.
If you’re still having trouble after those checks, then I think I’d be stripping the lever down to make sure that you installed the two lever piston seals correctly. First things first, though; see how the caliper set-up goes…
SteveUK MTB
July 8, 2011 at 7:41 pm
Hi Steve,
Thanks for your quick reply and thoughtful advice.
Upon inspection, the problem was with the lever or rather my own foolishness. After rebuilding it with the new seals I had inadvertently re-seated the circlip on the wrong side of the piston chamber (in the groove machined for the wire boot clip). This meant the piston was returning a few mm too far (and so not re-setting the pressure in the mc), and resulting in the pads ‘sucking’ back on release of the lever.
Thanks again for your thoughts…now everything is bled and frighteningly firm!
Cheers and all the best,
Chris
Chris
July 15, 2011 at 5:55 pm
How can i remove the piston lever pin if it has split “slipped with allen key” asi amunable to screw itoff the lever to do a rebuild :-[. Cheers
Jack Elliott
August 26, 2011 at 8:51 pm
Remove the pivot bolt (picture 4) and use some long-nosed pliers to grip the piston pin; then just turn the whole lever blade/brass barrel assembly until it threads off the pin.
SteveUK MTB
August 26, 2011 at 9:16 pm
Hi Steve, Do you know the dimensions of the cup seals on these brakes? I need a seal for a model car hydraulic brake and the small sizes are hard to find. The cylinder bore I need to seal is 8.3mm. do you know of any smaller brake systems??
Any help you can offer is appreciated,
Thanks
Tim
Tim Povey
April 23, 2012 at 3:53 pm
Hello Tim,
The OD of the lever piston seals is 10.3mm. I’d suggest the Brake Time or Tool Time forum at MTBR.com for a chance at somebody who could measure seals from other brakes. Good luck…
SteveUK MTB
April 23, 2012 at 4:10 pm
Thanks Steve,
will post over there and see what comes back!
Regards
Tim
tim povey
April 23, 2012 at 5:49 pm
Hi Steve,
Many thanks for the info here. Makes it dead easy. Well, nearly…
I had a real nightmare getting the circlip back on, even with proper (if cheap) circlip pliers. My biggest problem was holding the piston in compression, while trying to manouver the circlip into an impossibly small hole. My solution:

Crude but effective. In fact, so much so that I’ve just repeated the exercise on the back brake and all is now working well.
FWIW, in both cases moisture had entered through the outer seal and caused the circlip to corrode which in turn had gummed up the brass washer causing friction on the cylinder and the lever to stick. I guess later levers are better, but seeing as how I’ve not touched these for several years, I reckon I probably can’t complain.
Calipers appear to be working ok. Best left alone, I reckon, as I don’t have the cap tool to get in and replace the seals!
Once again, thanks very much.
Stuart Hall
October 23, 2012 at 11:26 pm
Dear Steve – You are a hero.
alex
January 16, 2013 at 5:41 pm
Hi Steve, I wonder if you could help me differenciate piston seals (items HBSP 109 and HBSP 108).
My master cylinder seems to be generating little pressure and I wonder if I have mounted them incorrectly. Thanks
Fran
May 6, 2013 at 3:56 pm
Hello Fran. If my memory serves me, one has a larger internal diameter than the other, although they both have the same external diameter. It’s been so long since I’ve done one of these, and I don’t have any in my spares to refer to. If in doubt, just switch them – I have a feeling that it’s apparent which goes where when you can see the corresponding width of the piston.
Is the lack of pressure there with the system bled, or are you having trouble filling the system?
EDIT: actually, here’s your answer: http://www.hopetech.com/webtop/modules/_repository/documents/2012RACEEVOMCylexploded.pdf HBSP109 has the smaller ID and is located inboard of HBSP108.
SteveUK MTB
May 7, 2013 at 10:22 am