DMR Revolver Rear Cassette Hub Overhaul
This is a guide for replacing the axle and bearings in a rear DMR Revolver Cassette hub. The instructions below were supplied by Rich at DMR. The Revolver takes two 6000 2RS bearings with dimensions of;
26mm (OD) x 10mm (ID) x 8mm (W). ‘2RS’ indicates that a bearing has two rubber seals. ZZ indicates metal shields.
DMR will supply their own or these popular sized bearings can be bought easily at any wholesalers. I’d strongly recommend using the best quality you can find; FAG or SKF are always well engineered. I recently bought a ‘bargain’ set of this size to sort my mate’s BigHit and almost ended up wrecking the chain stay as the outer race was slightly imperfect. Expect to pay £/$3-4 each plus ~£/$10 for a replacement axle.
Here’s what Rich at DMR gave me, I’ve added some pointers of my own which are printed in italics, the numbers in brackets are for the relevant pictures…
Tools required Parrot Pliers, Rubber Mallet, Bearing puller/press, 12mm Allen Wrench.
Remove the face washer from the RH (Drive Side) of the hub by firmly pulling it with either your fingers or a pear of Parrot pliers. (Some older models have a grub screw locking this on – the grub screw must be undone before removal) On both sides there is also a solid plastic seal set on top of the bearing. Use a small, flat-head screwdriver, gently pushed between the seal and bearing, to prise it out. If you’re doing an axle change or freehub swap and want to keep the bearing, you should take care not to damage the seals while doing this.
I rigged up a ghetto press to remove the bearings. Description and parts are noted after the DMR description.


Using a RUBBER mallet, sharply tap the end of the axle until the axel and the bearing pops out from the hub body. (Keep somewhere clean) I’m not sure that ‘tap’ is the right word!! It took a fairly substantial blow to shift the non-drive side bearing. Make sure there’s nothing breakable in line with the axle as you hit it; mine travelled a good 6-8ft when it finally left the hub. I also found that the drive-side bearing worked its way out during this procedure.


You will now be able to see into the hub itself. At the free hub end you will notice a star shaped recess. This is for a 12mm Allen wrench.
Insert a 12mm Allen wrench into the non-drive side so that it locates into the star shaped recess firmly.
You can now unscrew the free hub body.
More than likely the free hub will be on very tight. And will be a struggle to unscrew if you’re relying on the smaller section of your Allen wrench for purchase.
A trick around this is to clamp the short end and a little of the long bar of the 12mm Allen wrench into a vice. Locate the wheel onto the vertical Allen wrench and turn the wheel ANTI-CLOCKWISE! You’ll find it a whole lot easier as you’ll have loads of purchase on the bolt.
Once loosened unscrew the internal bolt until it falls out the hub body – don’t loose this! You’ll need it to fit the new free hub body.
Firmly grip the old free hub still attached to the hub body and pull it off.
Push on the new free hub body. Insert the bolt you removed with the 12mm Allen wrench and tighten.
Slide the axle back through and push the bearing in using a bearing press – If you don’t have a bearing press an old socket will do the job; just make sure it rests on the OUTER race of the bearing, or you’ll damage the bearing. Take your time and check regularly that the bearing is driving in evenly.
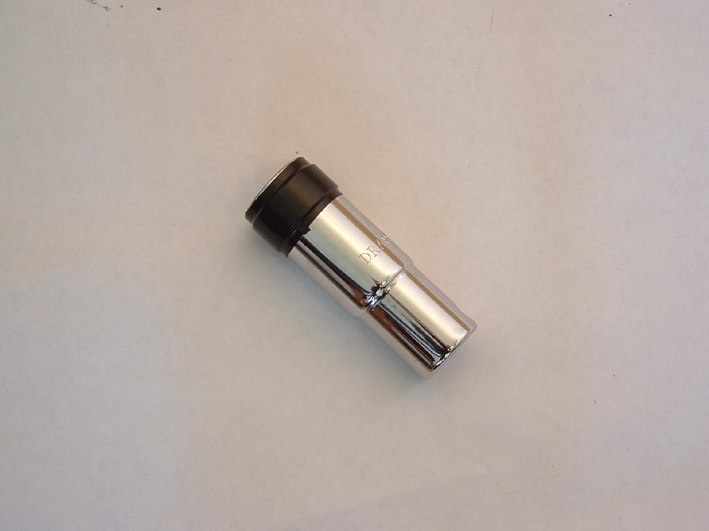


A 19mm socket should be used to get a good seat on the bearing’s outer race. I taped a ring of inner tube around the end of my socket as I found that it helped to keep it centred. Take it nice and easy with this. If the bearing starts to tilt, flip the wheel and use the axle to hammer the bearing back out to start over.
Refit the face washer and you’re done
Rich
DMR/Upgrade (Mechanic)
Pulling Bearings.
This link to an instruction on an ’01 Specialized FSR pivot bearing overhaul has a comprehensive description and photos of various ghetto presses. You’ll need a 1” (pulling) and a 19mm (pressing) socket to overhaul the Revolver. This description takes the non-drive side bearing out first.
The internally threaded DMR axle can be used to pull the bearings out of the hub, although try to avoid using the original axle bolts. You’ll need to be able to hold the axle rigid, otherwise it’ll just rotate around the bearing. First time I did this I just screwed a bolt into one end and pulled the bearing from the other. When I came to remove that bolt I found it impossible. After various attempt with grips, vices and all manner of odd looking hold devices, I ended up having to saw the bolt head off. The left-hand picture below shows my solution to this problem. The allen bolt is short, about an inch, and I drop a washer, thread a nut, then another washer onto the bolt. Make sure the nut is threaded tightly against the washer/bolt head before screwing the whole assembly fully into the axle.


On the non-drive side, drop the 1″ socket onto the hub body and use the necessary washers/spacers to hold a bolt in place. The bolt you use here should be long enough to thread at least an inch into the axle, otherwise you run the risk of threading the axle/bolt threads. The socket also needs to be deep enough to give enough thread between the inside of the socket and the end of the axle (~15mm). Using an allen key to hold drive-side bolt assembly, tighten the non-drive side bolt until all slack is taken up. Check that the socket is neatly in place and proceed to tighten; the axle/bearing should begin to slide out. Remove the bolt and socket assembly from the non-drive side.
Back to the drive-side and you may find the bolt tightly held in place. If it is, use a spanner to hold the nut you installed and loosen the bolt. Remove the assembly and slide the axle out, drop it into the 1″ socket and tap the end to release the bearing.
The same method can be used for the drive-side if you don’t want to hammer it out.

Thanks so much Steve! Would have been clueless if it weren’t for this writeup. Great bearing puller too!
Chris
July 29, 2012 at 6:31 am